When it comes to creating vibrant, long-lasting prints on garments, DTF (Direct to Film) printing has quickly become a go-to choice for many creators. From small businesses to large-scale apparel brands, this method offers flexibility, high resolution, and compatibility with various fabrics. But if you're struggling with uneven adhesion, faded colors, or peeling prints, chances are the issue lies in one critical factor: temperature.
At Hero DTF, we understand that achieving flawless results starts with understanding the science behind the transfer process. One of the most common questions we hear is: "What temperature is best for DTF transfers?" In this guide, we’ll walk you through optimal temperature settings, fabric-specific recommendations, pressing techniques, and best practices—so you can get the most out of your prints.

Understanding DTF Transfers
DTF printing is a multi-step process that involves printing designs onto a specialized PET film, applying adhesive powder, curing the powder, and finally heat pressing the film onto the garment. Unlike traditional screen printing or heat transfer vinyl (HTV), DTF allows for full-color, photo-quality prints without the need for weeding or pretreatment.
This process stands out for its ability to work with a variety of fabrics—cotton, polyester, blends, and more—making it a versatile option for apparel decorators. However, its effectiveness largely depends on using the correct temperature during the final pressing stage. Too hot, and you risk damaging the fabric or ink; too cool, and the transfer won’t fully bond.
Because every material reacts differently under heat, understanding the ideal temperature ranges for different textiles and film types is key. And remember, the heat press you use must deliver consistent and evenly distributed temperature across the platen to avoid partial transfers.
Optimal Temperature Ranges for DTF Transfers
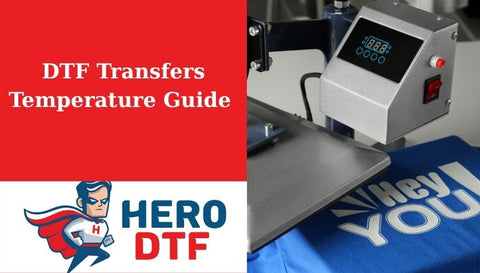
So what exactly is the best temperature for DTF transfers? While the answer may vary slightly depending on your materials and equipment, most professionals agree that the sweet spot falls between 275°F and 350°F (135°C to 177°C). This range allows the adhesive powder to fully melt and bond the ink to the fibers of the garment.
Going below this range may result in incomplete transfers, where parts of the design don’t stick or colors appear muted. On the other hand, exceeding 350°F may lead to scorching, distortion, or fabric damage—especially with synthetics like polyester. That’s why it’s essential to balance temperature, time, and pressure for reliable results.
In addition to film type and fabric composition, environmental conditions can also play a role. High humidity or extremely cold workspaces can affect the adhesion process, so try to keep your workspace climate-controlled for consistency. At Hero DTF, we recommend doing small test prints whenever you change materials or heat press settings.
Temperature Settings Based on Fabric Types
Each type of fabric has a different tolerance for heat, which directly influences your temperature setting. Cotton, for instance, can withstand higher temperatures, while polyester needs more delicate handling to prevent melting or shine. Cotton-polyester blends sit somewhere in between, requiring careful calibration.
Let’s break it down:
|
Fabric Type |
Temperature (°F) |
Temperature (°C) |
Press Time |
|
100% Cotton |
330°F – 350°F |
165°C – 177°C |
25 – 30 sec |
|
100% Polyester |
310°F – 330°F |
154°C – 165°C |
20 – 25 sec |
|
Cotton-Poly Blend |
320°F – 340°F |
160°C – 171°C |
22 – 27 sec |
This table gives a quick reference point, but remember: different brands of PET film and ink may require slight adjustments. Always check with your film supplier and do a test run to determine the optimal settings for your particular setup.
Factors That Influence DTF Transfer Temperature
Several variables can impact the ideal temperature required for a successful DTF transfer. Understanding these can help you fine-tune your process and avoid common issues.
1. Type of DTF Transfer Film
Not all PET films are created equal. Some are designed for hot peel, others for cold peel, and many have varying thicknesses and coating compositions. These characteristics affect how quickly the adhesive melts and adheres. Higher-quality films typically tolerate slightly higher temperatures and offer more consistent results.
2. Heat Source: Heat Press vs. Iron
Using a professional heat press ensures even and consistent temperature and pressure—both critical for a durable DTF transfer. In contrast, a household iron often fails to deliver uniform heat, leading to partial adhesion and poor durability. For best results, Hero DTF strongly recommends using a calibrated heat press.
3. Ink and Adhesive Powder Type
Different ink formulations and powder adhesives have distinct melting points. If you're using high-opacity inks or specialized powders for stretch garments, you'll likely need to adjust your temperature settings accordingly. Always consult the material datasheets if you’re mixing product sources.
4. Garment Thickness and Texture
Thicker or textured fabrics (like fleece or ribbed cotton) may require slightly more heat or time to ensure the transfer fully bonds to the material. Smooth surfaces like jersey or flat polyester transfer more efficiently and typically require less time.
5. Environmental Conditions
Temperature and humidity in your workspace can subtly affect curing and adhesion. Extremely cold rooms can lead to uneven transfer, while high humidity might hinder powder curing. Maintaining a controlled environment helps reduce these risks.
By monitoring and adjusting for these variables, you can establish more consistent results across batches and garment types—essential for scaling DTF production.
Heat Press Application Guidelines
Applying your DTF transfer correctly is just as important as printing and curing it. Follow these step-by-step instructions to ensure a successful press:
Step 1: Preheat the Garment
Before you apply the transfer, preheat the fabric on the heat press for about 5 seconds. This removes any moisture and smooths out wrinkles, ensuring better adhesion.
Step 2: Position the Transfer Film
Place the PET transfer film on the garment with the ink side facing down. Align the design exactly where you want it printed. Use heat-resistant tape if necessary to prevent shifting.
Step 3: Set the Right Pressure and Temperature
Adjust your heat press to medium-firm pressure (typically 30–60 PSI). Use the temperature and time values listed in your fabric-specific chart. For example, 330°F for cotton pressed for 25 seconds.
Step 4: Press the Transfer
Close the heat press and apply even pressure. Make sure the platen is flat and distributes heat evenly across the garment. This ensures all parts of the design adhere properly.
Step 5: Peel the Film (Hot or Cold)
Depending on your transfer film type, peel the carrier sheet either immediately (hot peel) or after it has completely cooled down (cold peel). Follow the manufacturer’s instructions for best results.
Step 6: Perform a Stretch Test (Optional)
After peeling, gently stretch the garment around the design to check durability. If the design cracks or lifts, adjust your settings accordingly for the next press.
Step 7: Calibrate Regularly
Heat presses can lose accuracy over time. Use a heat gun or thermometer strip to check the platen temperature. At Hero DTF, we recommend recalibrating your machine monthly to ensure optimal performance.
Peel Methods: Hot Peel vs. Cold Peel
After heat pressing, the next step is to peel the PET film—either while it’s still hot or after it cools down. Which one you choose depends on the type of film you're using and the desired finish. Hot peel films allow you to remove the carrier sheet immediately after pressing, which is faster and can result in a softer feel. Cold peel films require the transfer to cool completely before peeling, and often yield a more matte and durable finish.
Many professionals find cold peel to be more forgiving, especially on polyester or stretchy fabrics. However, it can take more time and requires a bit more patience. Hot peel is ideal for fast production runs where speed is essential, but it’s crucial to peel quickly and confidently to avoid ruining the print.
Make sure to read the manufacturer’s instructions for your PET film. Some products are labeled as “universal peel,” meaning they work either way, while others are strictly designed for one method. Experimenting with both can help you determine which style works best for your workflow and desired finish.
Common Issues and Troubleshooting
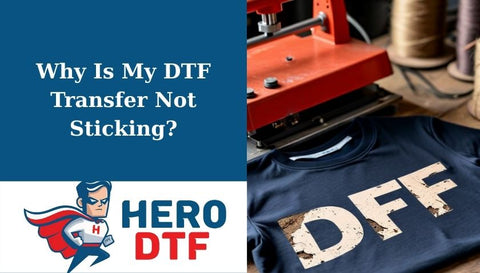
Even when you follow the recommended temperature settings, things can still go wrong. Common issues include poor adhesion, grainy prints, ink bleeding, or edges that won’t stick. These problems are often caused by incorrect temperature, insufficient pressure, or pressing for too short a time.
If your transfer is not sticking, start by increasing the pressing time in small increments. Next, try bumping the temperature up by 5°F or adjusting your pressure slightly. Just be careful not to overdo it—excessive heat can scorch delicate fabrics or cause the ink to bleed.
At Hero DTF, we often suggest doing a “stretch test” after peeling the film. Gently tug the fabric to see if the design cracks or lifts. If it stays intact, your settings are spot on. If not, take notes and adjust your next press accordingly. Troubleshooting is part of the process, especially when working with new garments or unfamiliar films.
Order your UV DTF Transfers today.
Best Practices for Consistent Results
Consistency is key in DTF printing. To ensure each transfer looks just as good as the last, develop a repeatable process. That means logging your temperature, time, and pressure settings for each fabric type and regularly calibrating your heat press. Even small changes in humidity or fabric thickness can impact the final result.
Perform a few test presses whenever you switch rolls of film, inks, or garments. Keep a spreadsheet or notebook with your best settings so you can refer back quickly. Investing in a high-quality infrared thermometer is also a smart move—it’ll help you verify your press’s true temperature without relying solely on the digital display.
Lastly, maintain your heat press and workspace. Dust, lint, or residue buildup can affect pressure and transfer quality. Clean your platen regularly and store your films in a cool, dry place. At Hero DTF, we believe these small habits make a big difference in print quality and customer satisfaction.
Curing Temperature for DTF Powder
An essential stage in the DTF process is curing the adhesive powder applied to the printed PET film. The powder must melt and bond properly to ensure smooth application and wash durability. The ideal temperature for curing DTF powder is typically between 250°F to 270°F (120°C to 132°C). The curing time depends on your curing method:
-
Curing Oven: Heat for 2–3 minutes at the set temperature until the powder melts evenly.
-
Heat Press Hovering: Hover the press just above the film (without closing) for 2–3 minutes.
Avoid overcuring, which can cause the powder to become too hard and brittle, or undercuring, which can result in poor adhesion during transfer.
Order your Gang Sheet Builder DTF Transfers today.
Washing Temperature for DTF Transfers
Once your DTF design has been successfully applied, maintaining print quality over time depends heavily on how the garment is cared for. Washing temperature plays a big role in the longevity of the transfer.
For best results:
-
Wash at cold or warm water settings (86°F to 104°F / 30°C to 40°C).
-
Use mild detergents, and avoid bleach or fabric softeners.
-
Turn the garment inside out to reduce friction during washing.
-
Tumble dry on low heat or hang dry.
High temperatures during washing or drying can cause cracking, fading, or peeling of the DTF design over time. Following these care instructions helps preserve the vibrancy and durability of the print.
Conclusion
Temperature plays a pivotal role in the success of your DTF transfers. Whether you're working with cotton, polyester, or blends, the right settings can mean the difference between a flawless print and a failed transfer. By understanding fabric-specific temperatures, mastering your heat press technique, and staying consistent, you can elevate the quality of your prints.
Hero DTF in Nj is here to support you with premium films, expert advice, and industry-tested resources. With the right temperature and technique, your DTF creations will stick stronger, last longer, and look better than ever.


